How to Fix Peeling Kitchen Cabinets
How to fix peeling kitchen cabinets! If you’ve noticed that the once-pristine surfaces of your cabinets are starting to peel and crack, don’t fret. We’re here to help you tackle this common issue and restore your cabinets to their former glory.
Peeling cabinet surfaces not only look unsightly, but they can also compromise the functionality and durability of your kitchen. But fear not! With a little know-how and some simple steps, you’ll be able to repair those peeling areas and prevent further damage.
We’ll walk you through everything you need to know about fixing peeling kitchen cabinets. From understanding different cabinet materials to providing step-by-step instructions for repairing them, we’ve got you covered. So let’s get started on transforming your tired-looking cabinets into beautiful focal points in your kitchen!
Understanding the Different Cabinet Materials

When it comes to kitchen cabinets, understanding the different materials they are made of is crucial in determining how best to fix any peeling issues. There are various options available, but two common ones are thermofoil and wood veneer or laminate.
Thermofoil cabinets have a plastic-like coating that is heat-sealed onto an engineered wood substrate. While they offer durability and easy maintenance, over time, the adhesive holding the thermofoil layer in place can weaken or break down, leading to peeling.
On the other hand, wood veneer and laminate cabinets feature a thin layer of real wood or a printed imitation wood grain adhered to particleboard or plywood. These types of cabinets tend to be more resistant to peeling than thermofoil but may still experience problems if exposed to excessive moisture or wear.
Understanding your cabinet’s material composition will help you choose appropriate repair methods and ensure long-lasting results. So take some time to identify what type of cabinet material you have before diving into the repairs!
Thermofoil vs. Wood Veneer and Laminate
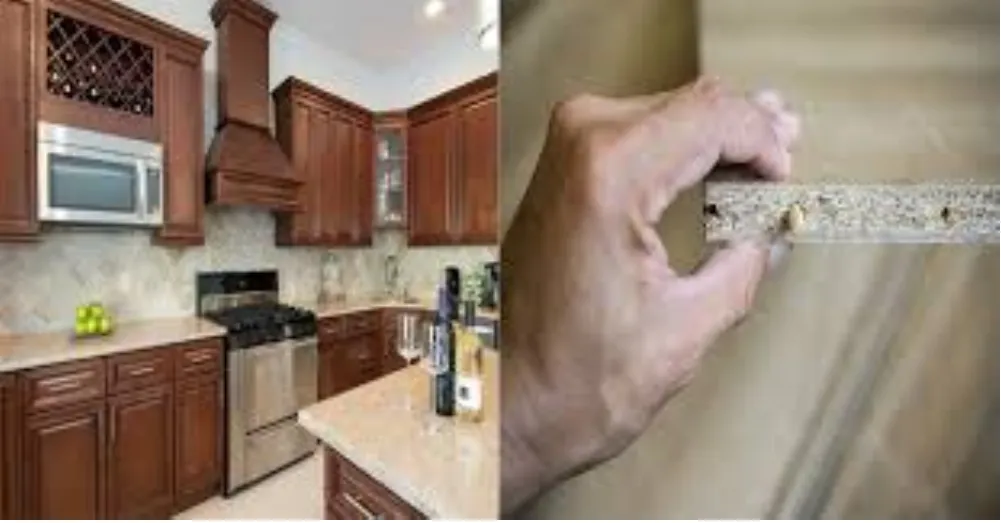
Understanding the Different Cabinet Materials
When it comes to kitchen cabinets, there are several materials commonly used, such as thermofoil, wood veneer, and laminate. Each material has its own unique characteristics and benefits.
Thermofoil is a popular choice for its affordability and durability. It is made from a thin layer of PVC that is heated and molded onto medium-density fiberboard (MDF). Thermofoil cabinets have a smooth surface that resists chipping and peeling.
Wood veneer, on the other hand, offers a more natural look. The process of making it involves bonding real wood veneer to MDF or plywood. Wood veneer cabinets have a rich texture and can be stained or painted to match any décor.
Laminate cabinets are constructed by applying layers of resin-infused paper to particle boards or plywood. They offer excellent moisture resistance and come in a wide range of colors and patterns.
Each material has its pros and cons, so it’s important to consider your budget, style preferences, and maintenance requirements when choosing between thermofoil, wood veneer, or laminate for your kitchen cabinets.
Necessary Safety Precautions
When it comes to fixing peeling kitchen cabinets, safety should always be your top priority. Here are some necessary precautions you need to take before you start the repair process.
First and foremost, make sure to wear protective gloves and goggles to protect your hands and eyes from any potential injuries or chemical exposure. Additionally, ensure that you are working in a well-ventilated area to avoid inhaling any fumes from adhesives or solvents.
Next, remove all items from the cabinets and clear the surrounding area. This will prevent anything from getting damaged during the repair process and also provide you with ample space to work.
Keep children and pets away from the workspace for their safety as well as yours. The tools and materials used in cabinet repairs can pose risks if not handled properly.
By taking these necessary safety precautions, you can ensure a smooth and accident-free experience while fixing your peeling kitchen cabinets. Remember, it’s better to be safe than sorry!
Tools and Materials You’ll Need
To repair your peeling kitchen cabinets, you’ll need a few essential tools and materials. These items will help you properly remove the damaged layer, apply new adhesive, and secure everything together.
It’s important to have the right equipment on hand. You’ll need a scraper or putty knife to carefully remove the peeling layer from your cabinets. A heat gun can also be useful for loosening stubborn sections of peeling material. Additionally, sandpaper or a sanding block will come in handy for smoothing any rough surfaces before applying adhesive.
Next, gather all the necessary materials for this project. High-quality contact cement is crucial to ensuring a strong bond between layers of material. Make sure to choose an appropriate adhesive based on whether your cabinets are made of thermofoil, wood veneer, or laminate. You may also need some tape or clamps to hold the repaired sections securely while the glue dries.
Don’t forget about safety! Keep protective gloves and eyewear nearby throughout the repair process to safeguard yourself against any potential accidents.
By having these tools and materials ready ahead of time, you’ll be well-prepared to fix those pesky peeling kitchen cabinets efficiently and effectively!
Essential Equipment
When it comes to fixing peeling kitchen cabinets, having the right tools and equipment is essential. Here are some must-have items that will help you tackle this project with ease.
A heat gun or hairdryer is crucial for removing the peeling layer from your cabinets. This tool generates heat that helps loosen the adhesive and makes it easier to peel off the damaged surface.
A putty knife or scraper is necessary for effectively removing old adhesive from the cabinet surface. These tools allow you to scrape away any residue left behind after peeling off the damaged layer.
You’ll need sandpaper or a sanding block to smooth out any rough spots on your cabinets before applying new adhesive. This step ensures a clean and even surface for better adhesion.
With these essential pieces of equipment in hand, you’ll be well-equipped to repair those pesky peeling kitchen cabinets!
Required Materials
To successfully fix peeling kitchen cabinets, you’ll need a few essential materials. These items will ensure that you have everything necessary to complete the repair job effectively.
You’ll require sandpaper or a sanding block to smooth out any rough edges and prepare the cabinet surface for adhesive. Additionally, a putty knife or scraper will be vital for carefully removing the peeling layer and old adhesive from the cabinets.
Next, you’ll need a strong adhesive specifically designed for use on kitchen cabinets. Make sure to choose an adhesive that is suitable for the material of your cabinets, whether it’s thermofoil, wood veneer, or laminate.
Having some clamps or heavy objects on hand can help secure the materials together while allowing the adhesive to dry properly. This step ensures that your repaired cabinets stay in place once fixed.
Having these required materials readily available before starting your cabinet repair project will save you time and frustration along the way!
Step-by-Step Instructions for Repairing Peeling Cabinets
Repairing peeling cabinets can be a daunting task, but with the right steps and materials, you can restore them to their former glory. Here’s a step-by-step guide to help you fix those unsightly peels.
Start by removing the peeling layer using a putty knife or scraper. Be careful not to damage the underlying surface as you peel away the loose material. Next, remove any old adhesive residue left behind from the previous layer. A solvent or adhesive remover can come in handy for this step.
Once all residues are removed, it’s time to apply a new adhesive. Spread an even layer of contact cement on both surfaces—the cabinet and the replacement material—using a brush or roller. Wait until it becomes tacky before carefully pressing both surfaces together.
After allowing sufficient drying time for the adhesive (refer to manufacturer instructions), secure the materials by clamping them together firmly. This will ensure proper bonding and prevent future peeling issues.
Remember to clean off any excess adhesive that may have squeezed out during clamping using a clean cloth dampened with mineral spirits or acetone.
By following these step-by-step instructions, you’ll be able to repair your kitchen cabinets and give them a fresh look without spending significant amounts on replacements!
Removing the Peeling Layer
When it comes to fixing peeling kitchen cabinets, the first step is removing the peeling layer. This is crucial because if you don’t remove it properly, your repair job won’t hold up well in the long run. Begin by gently peeling off any loose or damaged sections of the cabinet surface. Take your time, and be careful not to damage the underlying wood or laminate.
Once you’ve removed all the loose pieces, use a scraper or sandpaper to smooth out any rough edges or remaining bits of peeling material. You want a clean and even surface for better adhesion later on. Be sure to wear protective gloves and eyewear during this process, as tiny particles may become airborne.
After completing this step, you’re ready to move on to preparing the cabinet for repair by removing old adhesive residue.
Removing Old Adhesive
When it comes to fixing peeling kitchen cabinets, one of the key steps is removing old adhesive. Over time, the adhesive may have worn out or become ineffective, leading to the peeling problem. Removing this old adhesive is crucial to ensuring a strong and long-lasting repair.
To start with, use a utility knife or scraper to gently scrape off any loose or peeling sections of the cabinet surface. Be careful not to damage the underlying material as you do so. Once you have removed all the loose pieces, it’s time to tackle the old adhesive.
Using a heat gun or hairdryer in a low-heat setting, carefully apply heat to soften and loosen the old adhesive. This will make it easier to remove without causing any damage. Use a putty knife or scraper to gently scrape away the softened adhesive until all traces are gone.
Wipe down the cabinet surface with a clean cloth dampened with rubbing alcohol or an appropriate cleaning solution. This will help remove any remaining residue and prepare the surface for applying new adhesive later on.
Remember that when removing old adhesive from your kitchen cabinets, patience and caution are key! Take your time and be gentle throughout this process to avoid further damaging your cabinets.
Applying the New Adhesive
Applying the new adhesive is a crucial step in fixing peeling kitchen cabinets. This process ensures that the layers of material adhere securely, preventing any future peeling or damage. To start, carefully apply a thin layer of adhesive to both the cabinet surface and the backside of the peeling material.
Using a brush or roller, spread the adhesive evenly over these surfaces, making sure to cover all areas completely. Take your time during this step to ensure proper coverage and adhesion. Once applied, let the adhesive dry according to the manufacturer’s recommended time.
After allowing sufficient drying time, carefully align and press down on the peeling material onto the cabinet surface. Apply even pressure across its entire surface using your hands or a clean cloth. Make sure there are no air bubbles trapped underneath by smoothing out any wrinkles or imperfections.
Remember, applying new adhesive requires precision and patience for optimal results. Taking your time during this step will ensure a strong bond between materials and help prevent any further issues with peeling cabinets in your kitchen space!
Allowing the Adhesive to Dry
Allowing the adhesive to dry is a crucial step in fixing peeling kitchen cabinets. Once you have applied the new adhesive, it’s important to give it enough time to fully set and bond with the cabinet surface. This will ensure a strong and long-lasting repair.
During this drying period, it’s essential to avoid any contact or movement that could disrupt the bonding process. Make sure not to touch or disturb the repaired area until the adhesive has completely dried. It’s best to follow the manufacturer’s instructions for recommended drying times, as these can vary depending on the type of adhesive used.
While waiting for the adhesive to dry, take this opportunity to clean up your work area and gather any tools or materials that may need cleaning or disposal. This will help keep your workspace organized and ready for future projects.
Remember, patience is key when allowing the adhesive to dry. Rushing this step could compromise the effectiveness of your repair job. So sit back, relax, and let nature do its work while you wait for those cabinets to be as good as new!
Securing the Materials Together
After applying the new adhesive to your peeling kitchen cabinets, it’s crucial to secure the materials together properly. This step will ensure that the layers stick together firmly and prevent any future peeling or damage. Here’s how you can go about securing the materials together:
- Use clamps. Once you’ve applied the adhesive, carefully align the peeling layer with the cabinet surface. Then, use clamps to hold them tightly in place. Make sure to position the clamps strategically along both vertical and horizontal edges for even pressure distribution.
- Apply pressure evenly: To achieve a strong bond between the layers, apply even pressure across their entire surface area. You can do this by using a roller or a block of wood covered with a cloth to press down on each section of the repaired area.
- Allow sufficient drying time: After securing everything together, leave it undisturbed for at least 24 hours to allow ample time for the adhesive to fully dry and create a solid bond between surfaces.
Remember that proper security is essential for long-lasting results. Taking these measures will help ensure that your newly repaired cabinets remain intact and beautiful for years to come!
Cleaning the Cabinet Surface
Cleaning the cabinet surface is a crucial step in fixing peeling kitchen cabinets. It not only helps to remove any dirt or grime but also ensures that the adhesive sticks properly. To clean the surface, start by wiping it down with a mild detergent and water solution. Use a soft cloth or sponge to gently scrub away any stains or residue.
Once you have cleaned the surface, rinse it thoroughly with clean water to remove any soap residue. Make sure to dry it completely before moving on to the next step. This will prevent moisture from causing further damage or peeling.
In addition to regular cleaning, it’s important to avoid using harsh chemicals or abrasive cleaners, as they can strip away the finish of your cabinets. Stick to gentle cleansers and always test them on an inconspicuous area first.
Remember, proper cleaning is essential for maintaining the appearance and longevity of your cabinets. By following these steps, you can ensure that your newly repaired cabinets stay in great condition for years to come!
Tips to Prevent Future Peeling
Preventing future peeling of kitchen cabinets is essential to maintaining their appearance and functionality. Here are some helpful tips to keep in mind:
- Avoid moisture: One of the primary causes of cabinet peeling is moisture. To prevent this, make sure to wipe up any spills or splashes immediately, especially around the sink area. Use coasters for glasses and mats under plants to avoid water damage.
- Steer clear of too much heat exposure: Heat can weaken adhesive and cause cabinets to peel. Protect your cabinets by keeping them away from direct heat sources like stovetops and ovens. Consider installing a range hood or using heat-resistant pads when cooking.
- Clean with care: Harsh chemicals and abrasive cleaning tools can damage the finish on your cabinets, making them more susceptible to peeling. Opt for mild soap or specialized cabinet cleaners that are gentle on the surface. Use soft cloths or sponges instead of rough scrub brushes.
By following these simple tips, you can significantly reduce the risk of future peeling and extend the lifespan of your kitchen cabinets!
Deciding Between Repair and Replacement
When faced with peeling kitchen cabinets, one important decision to make is whether to repair or replace them. This choice will depend on several factors, such as the extent of the damage, your budget, and your personal preferences.
If only a small portion of the cabinet is peeling and the rest is in good condition, repairing it might be a viable option. By removing the peeling layer, applying new adhesive, and securing everything together properly, you can restore the cabinet’s appearance and functionality.
On the other hand, if multiple cabinets are heavily damaged or if there are underlying structural issues causing the peeling, replacement may be necessary. It could also be an opportunity to upgrade to a different material or style that better suits your taste.
Consider your budget as well. Repairing cabinets can be more cost-effective than purchasing new ones. However, if repairs are temporary fixes or if extensive repairs are needed throughout your kitchen, replacement may provide a longer-lasting solution.
Choosing between repair and replacement requires careful consideration of various factors specific to your situation. Take into account both short-term needs and long-term goals for your kitchen space before making a final decision on how to address those pesky peeling cabinets!
When to Seek Professional Help
While repairing peeling kitchen cabinets can be a DIY project, there are instances where it’s best to seek professional help. Here are some situations where bringing in experts might be necessary:
- Extensive damage: If your cabinets have severe peeling or multiple layers that need repair, it may require more expertise and specialized tools than what you have available.
- Lack of time or experience: Repairing peeling cabinets takes time and skill. If you’re short on time or don’t have much experience with home improvement projects, hiring professionals can ensure the job is done correctly and efficiently.
- Safety concerns: Working with adhesives and sharp tools can present safety hazards if not handled properly. Professionals are trained in proper safety protocols and have the necessary equipment to protect themselves during the repair process.
- Desired results: If you want your cabinets to look brand new without any visible signs of repair, professionals will likely achieve a higher-quality result due to their expertise and access to professional-grade materials.
Remember that seeking professional help doesn’t mean you’ve failed at fixing your peeling kitchen cabinets yourself; rather, it shows that you prioritize getting the best outcome for your home.
Conclusion
Understanding different cabinet materials, taking necessary safety precautions, gathering the right tools and materials, following step-by-step instructions for repairing peeling cabinets, and implementing preventive measures will help fix this common issue in your kitchen. Whether you choose to tackle the repairs yourself or enlist professional assistance ultimately depends on factors such as time availability, skill level, extent of damage, desired outcome, and personal preference.
By addressing these issues promptly and effectively when they arise—either through DIY methods or by seeking expert help—you’ll ensure that your kitchen remains a beautiful space where culinary magic happens for years to come!
